The End of Summer Harvest

I recall the summer when we planted two zucchini plants and ended up with more zucchinis (and, therefore, more zucchini bread, baked zucchini, fried zucchini, and chopped zucchini covertly slipped into all non-zucchini dishes) than we bargained for.

This year, for reasons not fully examined, we planted not two, but four zucchini plants, which results in things like this:


Moreover, despite a slow start in early summer, our raspberry bushes are now lavishly producing, and we pick ripe berries by the bowlful.  My oldest daughter, who is more ambitious than I am, looks up websites with titles like 1000 Things to Do With Raspberries.  I bake raspberry pies with my three hand-on helpers and invent ways they each can participate in the measuring and rolling and crimping.


Then there's that one corner of the garden, that corner where my husband absentmindedly tossed a gourd late last fall after it had sat (and then withered) on our front porch as a seasonal decoration.  

Well, that little corner of the garden has sprung to life with gourds.  Almost literally.


It started off so innocently with one child's vision to create two button-eyed gourd characters.  Then it grew.  A nuclear family of gourds emerged.


The group multiplied.  A gourd grandmother, a gourd baby, a gourd ghost -- even a gourd dog -- were added into the mix. 


It's like an extended family reunion is taking place on my kitchen counter.

Eventually, the garden will stop producing and I won't need to brainstorm yet another possible way to feed my family zucchini.  We'll no longer have an influx of raspberries and fingertips stained red from their juice.  The gourds will be disassembled and tossed into the far corner of the garden, that same garden where we'll probably plant too many zucchini plants next summer, too.

But for now, we relish in the harvest.

Visit Top Mommy Blogs To Vote For Me!
4

You taught me this, you know.

I still remember the evening, many months ago, when my friend and I worked side-by-side in my kitchen to prepare a large meal for guests.  While we were still prepping, she grabbed one of the dirty pans and started to wash it in our sink.

"You taught me this, you know," she said, looking over her shoulder.  "You once said that you always clean as you go while cooking so there's not too much clean-up at the end.  I've always remembered that."


I don't know why I recently recalled this exchange, but I did and I'm glad.  There's something gratifying about teaching someone something that they find useful, and there's something encouraging about hearing this spoken aloud.

That thing you do?  Well, I've learned from it.

When I bake pies, I always roll the crusts thin enough to cut the excess from around the edges and bake a cinnamon and sugar pie crust cookie.  My mom taught me that.  When I paint a room, I always edge with a one-and-a-half inch angled brush.  My dad taught me that.  When I stack dishes in the dishwasher, I always jam it too full.  My husband has tried to teach me about that.  Repeatedly.  (It's a work in progress.)

Every day, both in my personal life and in my profession, I'm teaching something, whether it's instruction for my students on how to analyze rhetoric, or instruction for my daughters on how to handle a conflict, fold laundry, or shut the screen door when they go outside rather than leaving it open and creating a direct thoroughfare for flies to enter the house.

(Because, obviously, flies only have enough brain capacity to fly into a house on their own volition, never back out.  Out requires great amounts of swooshing and close calls when that pesky bug is just an inch away from freedom, but for some unannounced reason, darts back into the screen and remain trapped.)

Today, I'm going to think about lessons that I've learned.  I want to be like my friend who gave voice to her thoughts; I want to share with others how they've impacted my actions and my life.

That thing you do?  You taught me that, you know.  Thank you.

Image compliments of Chapendra (flickr.com)

Visit Top Mommy Blogs To Vote For Me!
1

It's the End of the Summer as We Know It

There's no graceful way to end summer and begin the school year.  For the past week we've hovered in the space between summer and school, our toes curled over the edge, waiting to take the plunge.  It happened for me this morning when I taught my first class on campus, and it'll happen to my two older girls tomorrow morning when they climb onto the school bus.

It's a shock to the system, but we're ready.

Besides, we lived large this past week and fully enjoyed the final fruits of summer.  Joel and I spent an evening sampling great bites at a local wingfest and listening to an 80's cover band.  In other words, musically speaking, I was entirely in my zone.  Culinarily-speaking, Joel was entirely in his zone.  It was a happy night, a glorious union of applewood smoked bacon and Tainted Love.

Plus, once I returned from campus this afternoon, I loaded the van with towels and sand toys and drove the girls to a small lake about 15 miles from our house.  This trip to the lake was one of the few entries still languishing on our summer bucket list, and by golly, we were going to scratch it off even if we did so during the proverbial eleventh hour as summer drew to a close.

I'm so glad we did. 

As the girls played, their minds were fully in the present.  No worries about getting lost in the hallway or wondering who you'll sit with at lunch can exist when you're busy digging moats in the sand and catching salamanders in buckets.  As I watched them, my mind was fully in the present as well.  (Apparently, no worries can exist when you're listening to your children talking to salamanders.  Goodbye, little salamander.  I'll miss you, but I'll come back and visit you again.)

And that's how a summer ends.  One day it just stops, whether you feel prepared or not, and then you take the next step.

Goodbye summer.  We'll miss you, but we know that you'll come back and visit us again.

Visit Top Mommy Blogs To Vote For Me!
4

Artistic Liberties

 
Title: Artistic Liberties

Subtitle:  My daughter assures me that this is a dinosaur.
4

My Best Advice for New Teachers

Next week, I'll start my fifteenth year of teaching and the tenth at the university.  (That sentence makes me sound significantly older than I currently feel.)  Yesterday I was asked to share my best teaching advice to a group of new graduate students in our department.

As I prepared, I thought back to the start of my career.  How I felt nervous every morning.  How I doubted myself.  How I felt like a fraud as I stood at the front of the classroom, just slightly ahead of my students in life.

One semester, one academic year at a time, thousands of students have appeared on my rosters.  There's now a healthy buffer of experience and age between me and them.  From these fifteen years, I drew out three pieces of advice, both practical and philosophical, to share with these new teachers.


Stay ahead, even if it's by one step.  Regardless of the age level or subject matter taught, the work load can be staggering if it's not managed well.  For new teachers who are simultaneously planning a course while they're teaching it (an inevitable reality for every teacher at some point), it's wise to build enough buffer between what you're doing now and what you must do next.

One way to achieve this is to tackle grading resolutely.  Face that stack of essays head on.  Stare down the assignments, speeches, and exams.  This aggressiveness with grading has helped me to return work in a reasonable time frame (something appreciated by students) and it's also prevented me from drowning in a backlog of paperwork as new paperwork is continually submitted.

Act confidently even if you feel insecure.  In my public speaking classes, I teach my students how to present confidently even if they feel otherwise.  I've applied this principle to my own teaching, especially when I was a novice, so that my tone, posture, and demeanor displayed the confidence I wanted to naturally own.

By saying this, I'm not suggesting that teaching is mere theatrics or a disingenuous act.  But I am acknowledging that there's an element of performance to teaching.  Someone who's confident, even if it's a quiet confidence, can command a room. 

Act confidently, new teacher.  Eventually you'll feel confident, and even better, eventually you'll be confident.  You'll own the role that feels so foreign at the start.

Be proactively for your students.  This is the most important nugget of advice.  At the heart of teaching, there must be a genuine care for the well-being, both academic and personal, of students.  I used to wonder what my students thought of me.  I worried whether they liked me.  As the years have passed, that thinking has been flipped.  I aspire to like my students, to enter the classroom each day thinking well of them.

(Because, honestly, whether in teaching or in life, the amount of thinking that others do about us is not nearly as much as the amount we think others think about us.  This is good to accept.  It's not all about us.)

As a teacher, much like as a parent, being for them means that I invest great time and effort.  It means that I serve, support, pour out, and give something of myself.  At the same time, it means that I say "no" and "you can do better" and "try again."  I challenge my students to write, speak, and be the best they can possibly be because, ultimately, I want them to excel, not merely to be placated or awarded for averageness.

People know when you're for them, when you have their best interest in mind.  Students are no different. 

After presenting to the graduate students, I visited the four classrooms on campus where I'll teach this fall.  It's my start-of-the-semester ritual: checking out the rooms and technology, making sure the number of desks matches the enrollment, praying for each student who will sit in those chairs -- for their safety, for their studies, for their physical and emotional wellness, for their choices.

I've often thought it: these students end up on my rosters, and if only because of this, I consider them entrusted to my care.  Here's to the fifteenth year.

Visit Top Mommy Blogs To Vote For Me!
3

Frame It: Creative Ways to Fill A Picture Frame


At the heart of my DIY endeavors lies this basic premise: I want projects to be simple, affordable, and attractive.  Given this, I've shared this week about reinvigorating a home with color and solving a common problem with bathrooms.  I've given my best stenciling tips and explained how I recently beautified an old end table that I snagged at a garage sale for just five dollars.

Today's post covers how to creatively fill your picture frames.  Although decorating with frames seems intuitive, it's easy to fall into the habit of only framing pictures of your family, kids, or pets.  (For the record, if your family is anything like my family, you will never have all people looking at the camera at the same time.  We're a squirrely bunch.) 

It seems so obvious, after all: pictures go in picture frames!  But let's think beyond the box, wrap up DIY week with a bang, and examine several fresh ways to fill picture frames besides actual pictures. 

Rethink scrapbook paper or fabric.  If you've ever walked through a craft store, admired the aisle of scrapbook paper, and then thought, It's pretty, but what would I do with a piece of paper? it's time to reconsider.  Scrapbook paper doesn't need to wind up in a scrapbook.  It can wind up in a frame instead.
 
Take this piece of yellow ombre paper, for instance.


Or consider these navy, orange, and aqua graphic prints on cardstock that I've grouped together in an old frame revived by a coat of brushed nickel spray paint.  Whether by itself or in a set, interesting pieces of paper can be frame-worthy.


Of course, if you're looking for more ways to feature scrapbook paper, consider amping up the design by cutting a single sheet into shapes.  (A protractor -- or even tracing various-sized cups or bowls -- can assure your circles will actually be circular.)


I hung this frame in the bathroom I recently repainted.  The colors compliment the shower curtain wonderfully.  (With the vast selection of paper available and affordable pricing -- as little as 20 cents per page when on sale! -- you should be in luck to match any decor.)


If you want to get more involved, you can use scrapbook paper to create a scene, like these framed day-and-night villages that I made years ago and hung where my kids play.


Repurpose pictures from magazines or cards.  While I said I'd use this post to explain how to fill picture frames without using pictures, I primarily was referencing our own pictures -- those photos we take where the horizon is crooked, the child is blinking, or the power lines are marring the otherwise beautiful landscape.

But other people's pictures?  More specifically, pictures from magazines or greeting cards?  Those are great to frame!

I was given the January 2014 issue of Real Simple magazine (super fun!) and was immediately drawn to the feature article about achieving work-life balance.  I kept coming back to the photo spread: black and white shots depicting feats of balance with poise and strength.  I tore out the pages and found a bright way to preserve two of my favorites.


These frames now hang beside my DIY computer desk and serve as a continual (and visually engaging) reminder to keep life balanced and in perspective.


Spell it out with letters.  This is one of my favorite wall art ideas: the spelling of our last name with pictures of letters from places that are significant to our family, like our church, the hospital where our children were born, the university we attended, and a local dairy with awesome milkshakes. 

You know, the important stuff.


Of course, unless you can find an enormous picture frame, this only works for names with six or fewer letters.  For us, this means that my youngest daughter never will have her own frame.  (Poor, sweet Kerrington with her beautiful, yet uncommon and lengthy name.  It already was a foregone conclusion that we've forever denied her a souvenir key chain with her name on it.  Now it looks like she'll also never get a picture frame, either.)

Of course, you don't need to use letters just to spell your name.  I found these bold letter stickers for a quarter each, and I created a frame with my husband's and my initials on scrapbook paper.


In that same frame, I keep another design tucked underneath and bring it to the forefront during the month of December.  (That's ninja decorating right there.)


Showcase your child's artwork.  Now, our refrigerator is a constantly-rotating children's art gallery limited only by the number of magnets we own, but this particular painting was a Mother's Day gift from my nine-year-old.  It now hangs in our bedroom and makes me think of my daughter each time I see it.


In short, don't limit yourself to photos!  Whether using scrapbook paper or fabric, repurposing favorite pictures from magazine or greeting cards, spelling out a special message, or showcasing your kid's artwork, there are plenty of ways to make the most of picture frames as you decorate.

Frame on, my friends, frame on.  (And thank you for joining me here for DIY week!)

Visit Top Mommy Blogs To Vote For Me!
6

Giving New Life to an Old End Table

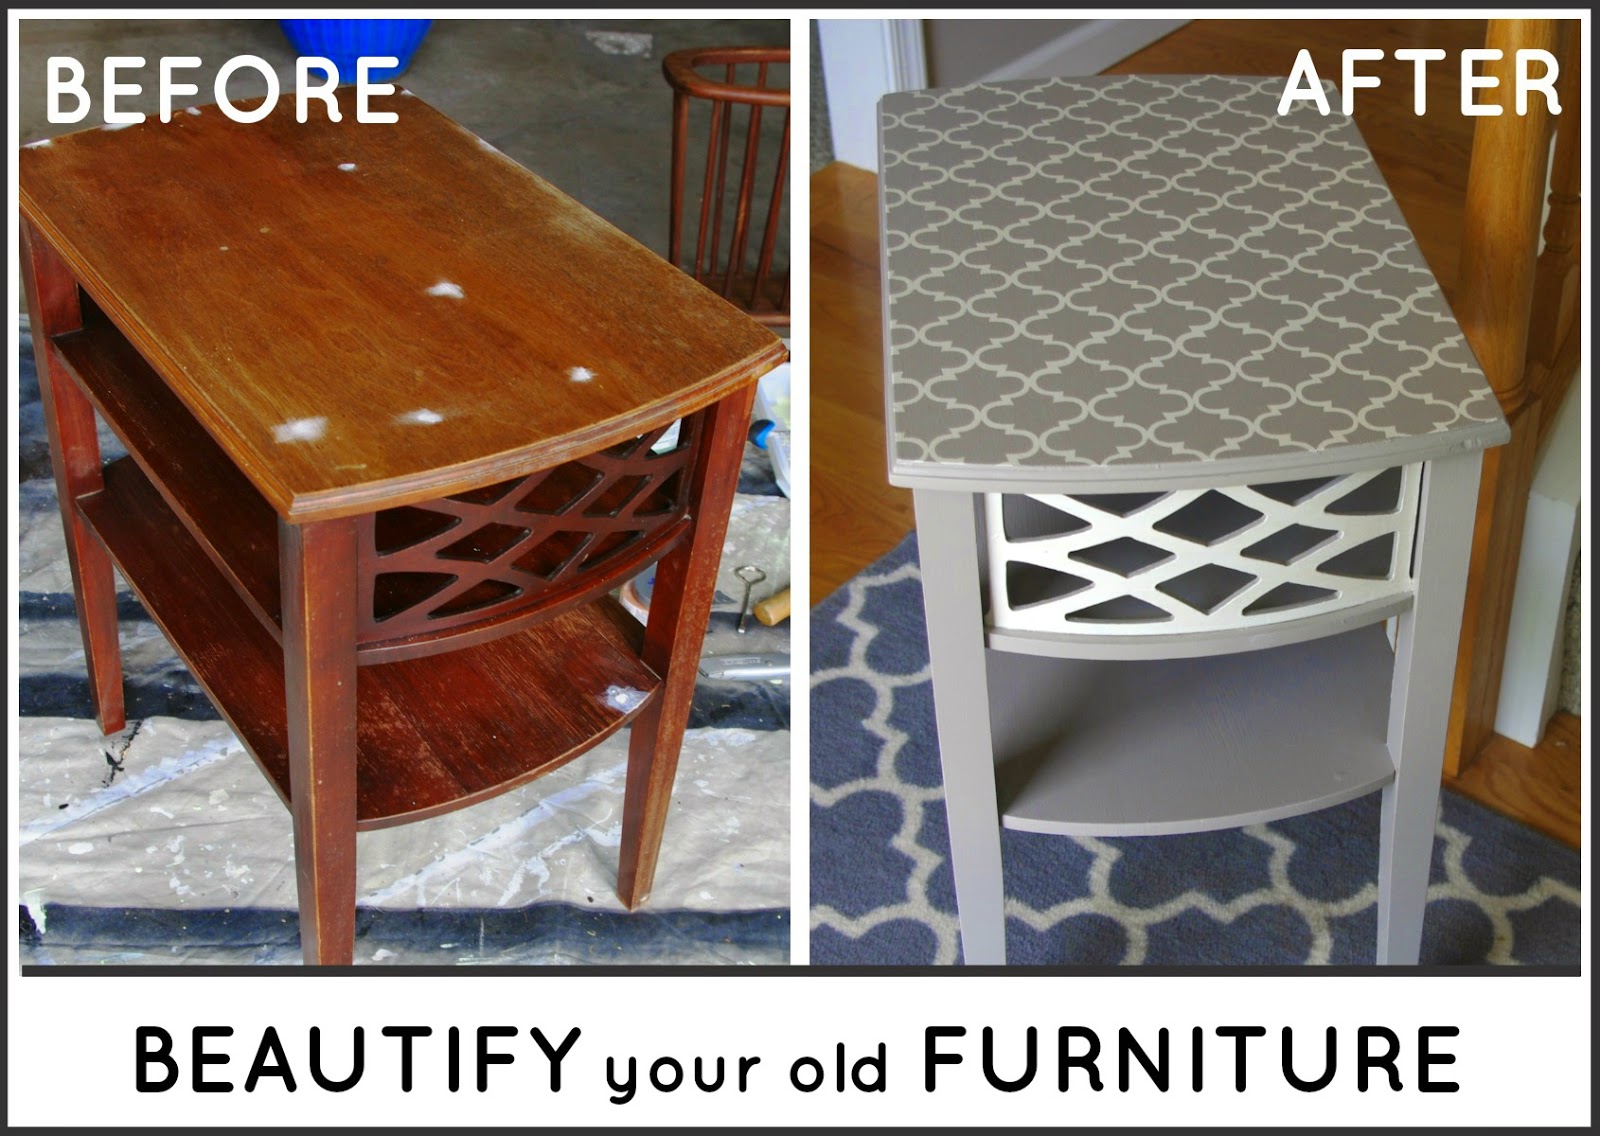
I've learned something about garage sales.  If you see something you like, grab it before somebody else does.  That's what I did when I saw this small end table on sale for five dollars earlier this summer. 


The table had several scratches, was marred with a water ring from a coaster-less drink, and badly needed a few fresh coats of stain or paint.

What was most obvious to me, though, was that the table had potential.  Loads of potential.  I fell in love with the decorative grill, and I knew the table could turn into something special with a little care.

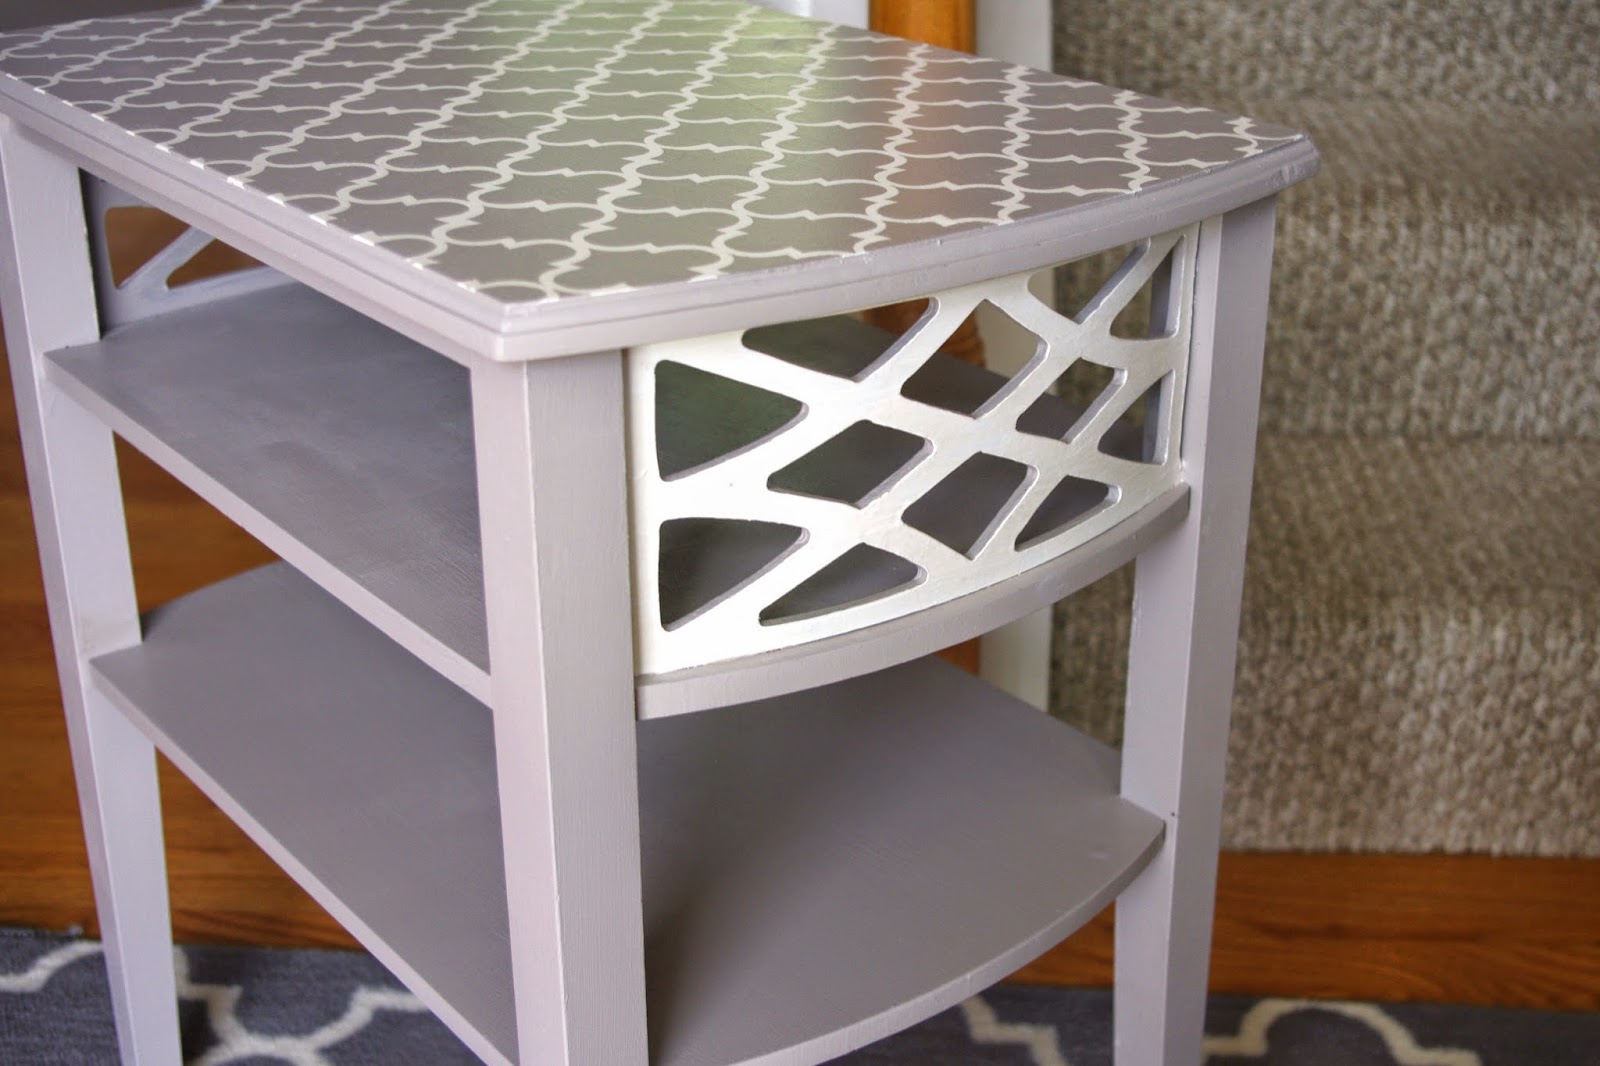
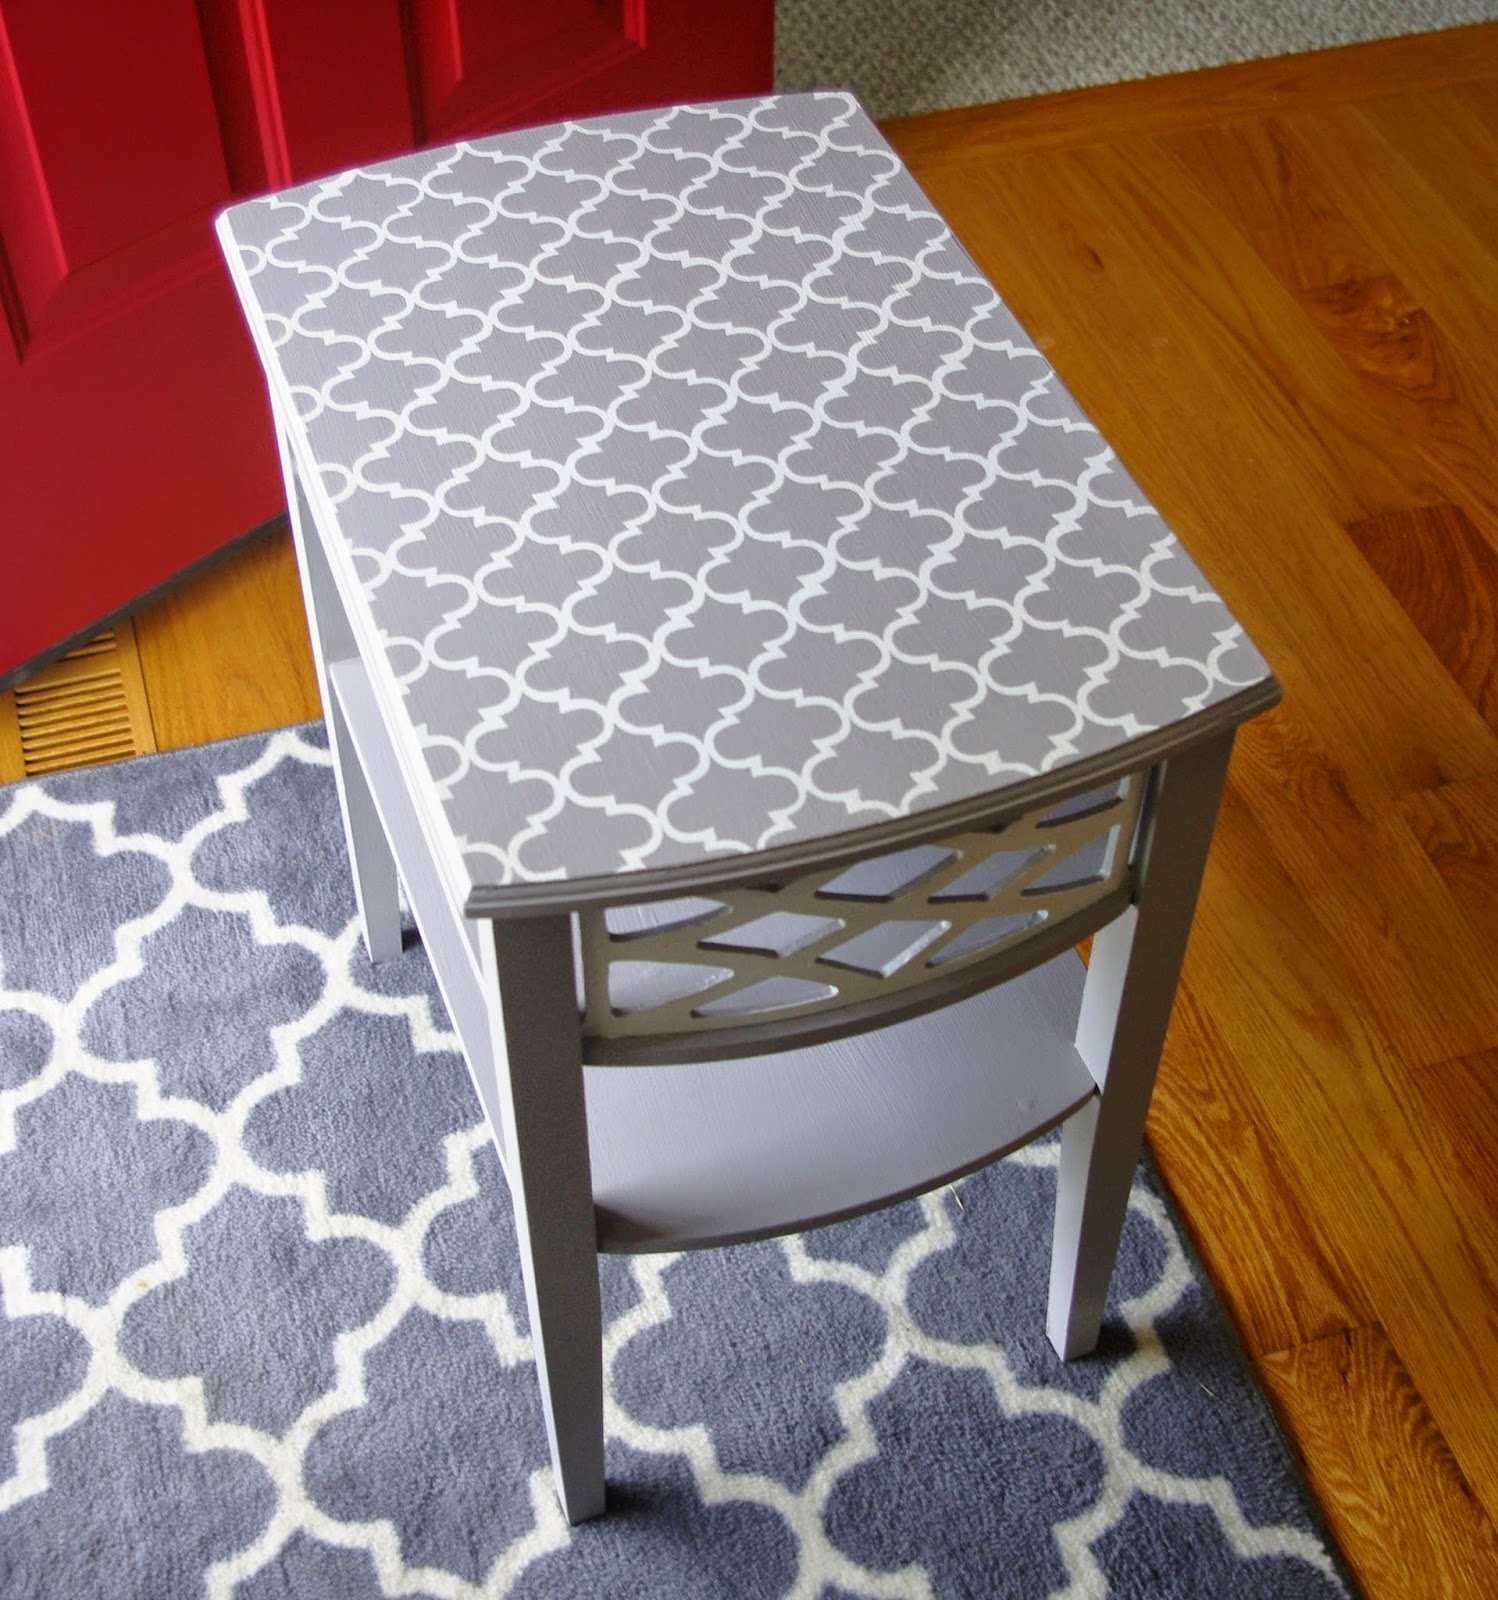
Before I explain the process, though, let me give you a sneak peek of the finished product.  Beautiful, no?  (I'm sighing happily.)


To start the restoration, I sanded the table, filled the scratches with wood putty, let the putty dry, re-sanded, and then wiped away all dust to have a clean surface to paint.  Since I wanted a neutral palate, I painted the entire table pale gray and contrasted the decorative grill with crisp white. 


I was pleased with the paint after three coats, but even with the contrast of the white decorative grill against the gray, the table didn't seem finished.  That's when I remembered my stencils.  (Click here for an easy DIY tutorial on stenciling.


I wanted white to be the accent, not the main color, so I repainted the table top white and began stenciling on top with gray.  The result is sleek and modern, and now the white on the grill is accentuated with the stenciled pattern on top.


In a lovely twist, I realized that the carpet in our entryway boasts the same pattern in the same colors.  Entirely unplanned, but entirely delightful!


Let me tell you, this was the best garage sale find of the summer and such fun to complete.  To think: five dollars for this table!  Score!


In a nutshell, you don't need to break the bank to add fun accent pieces to your home.  Scout out garage sales or discount stores, and look for pieces with good bones that simply need a little love.  I'm so proud of this table and the story behind it. 

What do you think of the transformation?
______________________________________________

Be sure to stop back tomorrow for one final post to conclude DIY week!  Next up?  Creative ways to fill picture frames beyond traditional photos!

Visit Top Mommy Blogs To Vote For Me!
4

How to Stencil Perfectly Every Time: an easy DIY tutorial

Last year I revamped three old tray tables that had been collecting dust in our storage closet.  I knew that a fresh coat of paint would brighten them considerably, but the real punch came when I stenciled the tops.  These little tables now get good use around our house, and I'm still delighted with how they turned out.  (Click here to see before-and-after pictures!) 


Lately I've been on a stenciling kick again, and I want to share a quick tutorial on how to stencil perfectly every time.

1) Choose your stencil kit.  I've enjoyed these Martha Stewart patterns, which I bought at Michael's with a 40% off coupon.  So far, I've used three different designs on three separate projects, so I'm getting extensive use from the kit.


2) Prep your surface.  Little work needs to be done during this step if you're stenciling a blank canvas or an already-painted piece of furniture, but if you need to establish a base coat first, paint the surface and allow ample time to dry.

3) Choose your paint.  When stenciling, I like to use wall paint, which is thicker, and therefore less runny, than acrylic paint.  You often can purchase small wall paint samples from home improvement stores (between $1 and $3) or get small bottles of acrylic paint in a multitude of colors (often under $1 at most craft stores.)


Wondering what colors work well together?  Refresh your knowledge of the color wheel (click here for a great HGTV tutorial), and determine whether a monochromatic, analogous, or complimentary approach best suits your design.

4) Adhere your stencil.  I've been on the fence about whether it's necessary to use spray adhesive while stenciling.  After completing projects both with and without adhesive, I've determined that it's not essential to mount the stencil with adhesive for small projects when I can hold the stencil still with one hand while applying paint with the other.  For large-scale projects or pieces I want to get perfect, however, I use adhesive to keep the stencil in place and lines crisp.

When in doubt, err on the side of caution.  Spray adhesive (sold at craft stores) prevents smudges and the need for touch-ups, which ultimately saves time and minimizes frustration.

5) Get to work with spouncers.  These foam applicators (also Martha Stewart, and also bought with a coupon from Michaels) make for an easy and smooth application of paint on whatever surface you're stenciling.  Once your stencil is set, dab the tip of the spouncer into paint and then lightly tap the paint until all exposed surface is covered thoroughly.


Once you're done with a section, lift the stencil carefully and let the area dry thoroughly before continuing the pattern.  (Patience is required here, little grasshopper.)  Repeat as many times as necessary.

6) Clean up.  To keep your stencils in good condition, gently wash off all paint after each use.  I rinse my stencils in the kitchen sink, using a sponge to wipe away any residual paint and then blot them dry.


7) Bask in your creation!  These simple canvases are some of my latest stenciling projects, and I've hung them as decorations in my daughters' bedrooms.  I used a sunburst pattern and alternated colors until the majority of the canvases were filled.


And there you have it: easy tips on how to stencil perfectly every time!  

Be sure to visit tomorrow to see my favorite DIY project of the summer: the restoration of an outdated end table that I snagged for just $5 at a garage sale.  It's a beauty!

Visit Top Mommy Blogs To Vote For Me!
0

Home Improvement: Brightening the Bathroom

Have you ever noticed that the average towel bar holds exactly one-and-a-half folded towels?  Not two.  Certainly not three. 

With three kids, we always had to drape one towel high over the shower rod or hang it from the doorknob after baths.  No more, my friends.  Recently I brightened the bathroom with a fresh coat of paint, a new shower curtain, a DIY wall decoration (more on this later this week), and -- here's the best part -- hooks instead of a standard towel bar.


Those hooks!  Not only do they hold plenty of towels, but even my youngest child can hang her towel properly, which had been challenging for her with a towel bar.

And there you have it: an easy and functional solution for any bathroom!

Visit Top Mommy Blogs To Vote For Me!
6

Reinvent Your Space with Color

At the beginning of every summer I draft a list of house projects to complete before the fall semester starts.  Now that stores are stocked with back-to-school supplies and my work inbox is seeing substantially more email activity, it's obvious that we're nearing the final hurrah of summer -- and that my window for home projects is shutting.

Given that, it's high time to share the DIY highlights from the summer! 

This week on the blog I'll be posting about decorating ideas, organizational tips, and simple DIY projects that have helped me beautify my space creatively and economically.  Today's post is all about color

Historically, I've been a person who's a bit skittish about extreme color.  (This may originate from one bad experience in my early twenties with hair dye.  Never again.)  I've played it safe and kept the walls of my house neutral.  Still, neutral walls and floors provide a clean foundation to bring in the colorful accents that you love.

Right now, I'm drawn to bright, fresh hues of green and blue.  Lime green especially.  Lime it up, baby.  These four streamlined pots in this eye-catching shade brightens the half-wall that separates my kitchen from our family room without major color commitment.


If you're looking for more commitment, one stand-out piece of furniture (in this case, an armchair that I picked up at a discount furniture store) can highlight a beloved color.  I snagged the accent pillow for $5 at a housewares store and then picked up the ceramic footstool (also at a significantly discounted price due to a chip on one side) for one final pop of color.

  
If you're nervous about taking the color plunge, remember that color almost always can be changed.  If I'm tired of lime green in a few years, I'll simply spray paint the pots and ceramic footstool, which is a remarkably easy and inexpensive way to freshen up an old piece.

Speaking of paint, this bench sits at our table along the half-wall in our kitchen.  It sees a lot of wear and tear: food splatters from meals, spilled drinks, and messes from kid's craft projects.  To protect and beautify the bench, I lightly sanded and sealed it with three coats of high-gloss paint left over from my computer desk project.


What a difference!  The green is now carried through my house: cabbage green bench in the kitchen and on our computer desk, lime green potted plants on the half-wall between the kitchen and family room, and the chartreuse arm chair in the family room.


Of course, once I start painting I tend to get on a roll.  I've owned this decoration for nearly a decade, and while I still liked the form and concept, I wasn't crazy about the colors. 


The solution was obvious: paint.  I lightly roughed up the individual plates with fine sandpaper, kept the largest center plate untouched as an anchor for the piece, and then branched out with a soothing palate of greens, blue, and neutrals before sealing the decoration with a low-gloss polyurethane spray.


And just like that, with a few simple accents and coats of paint, a fresh color scheme weaves its way through all the rooms on the downstairs level of my house. 

Like I said, lime it up, baby!
_____________________________________________

Stop back tomorrow for a terrifically simple DIY tip that solves a common problem in small bathrooms.  And if you haven't already, feel free to hang out with me on Facebook or even have new blog posts delivered directly to your inbox!  (Simply add your email to the email subscription box in the right column.) 

As always, thank you for joining me here!

Visit Top Mommy Blogs To Vote For Me!
2
Back to Top